SEARCH
social media
friends & sponsors
This form does not yet contain any fields.

    Entries in crafts (7)

    Monday
    Apr222013

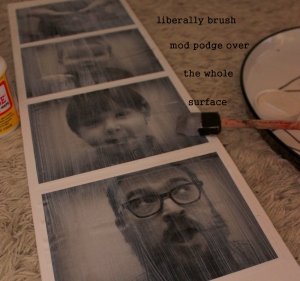
    like rain on your (neighbors') wedding day

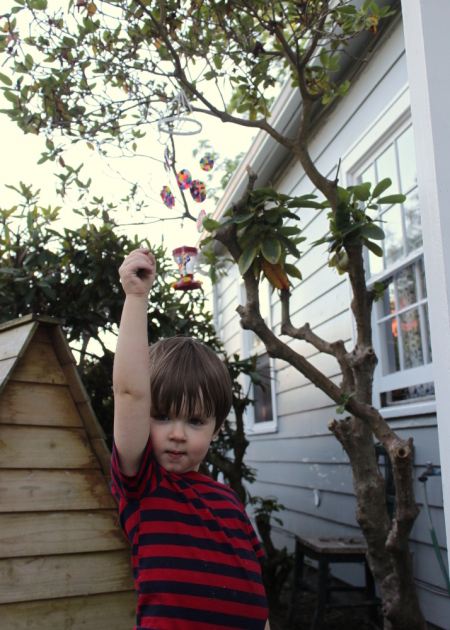
    Spring around here is a funny thing. It rains; it pours; your carport floods. And then, for one day, it is 62 degrees, bright and warm from the time the sun shows his unfamiliar face until he lays it down in the Sound. And those twelve hours are enough to make you optimistic about the possibility of enjoying outdoor life again, in a sincere way, not a ha-ha, good thing I'm wearing galoshes kind of way.  

    We actually had, like, THREE of those in a row, a week or two ago. And then my poor neighbors who had waited TWENTY FIVE YEARS to get legally married found themselves putting up clear flashing around their gorgeous deck in preparation for a torrential downpour that waterlogged their wedding day. PNW, we can't quit you, but you sure are a jerk sometimes. 

    To console ourselves after we put some measly starts into the garden only to have it frost overnight at 37 degrees and kill our broccoli, George and I decided our raised beds could use some flags to jazz them up a little. Zelda had never potato printed, so we got out some muslin, cookie cutters, a potato, some paint and a paring knife.

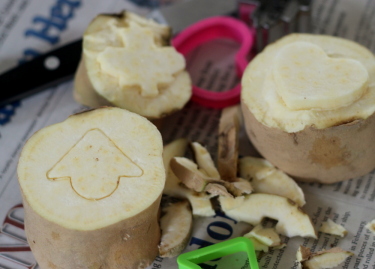
    If you don't know how to print with potatoes, there is no shortage of tutorials online that probably give all the details you need, but all I do is press a cookie cutter deep into the freshly-cut side of a potato, then slice into the side of the potato with my paring knife and cut away the excess potato. Not exactly rocket science.

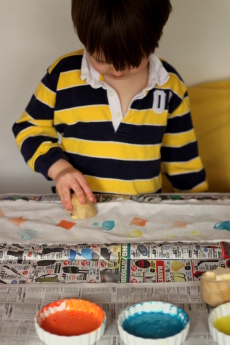
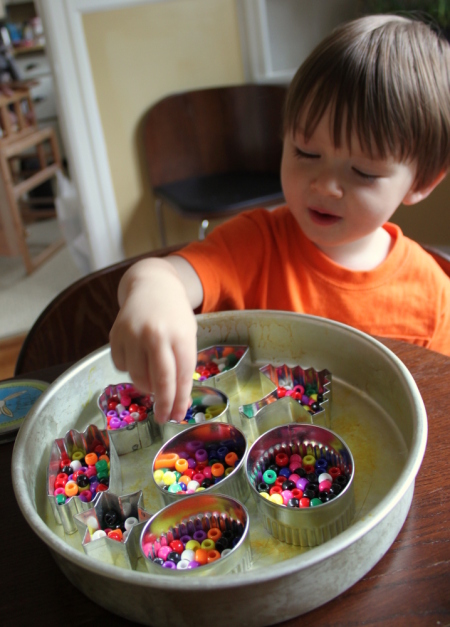
    George and Zelda chose an arrow, a heart, a star and a leaf. One arrow attempt failed, and turned into a bunny. Zelda kind of just tried to eat the potatoes, but George had a good time stamping the strips of muslin I had torn. Speaking of which, I didn't bother hemming these; I just snipped the selvedge edge of the muslin and tore it along the entire width of the fabric, leaving me with strips. 


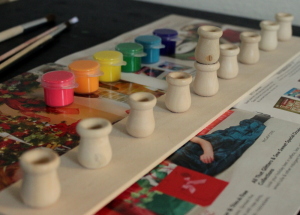
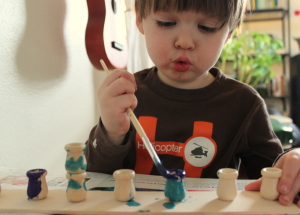
    I gave George dishes of the paint that came with a paint-your-own wooden car kit. I have no idea what kind of paint it is, but it's labeled non-toxic, and it hasn't yet run. Do I need to tell you how many times it's rained? When the kids were satisfied that they'd eaten enough raw potato and sufficiently stamped the soon-to-be flags, we cleaned up, and let everything dry while we ate lunch.

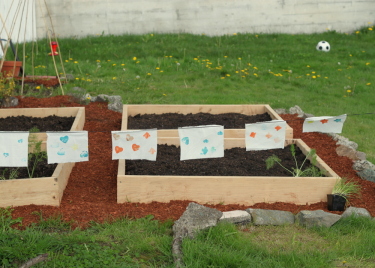
    While George napped that afternoon, I cut the strips into smaller pieces and sewed a ribbon across the top, bunting-style. We stuck bamboo poles into the ground on each end of the garden and tied on the flags. I love that it helps give the kids some ownership of our garden in these early, boring days of germination and perseverence. 


    Sunday
    Jan132013

    an early birthday

    I am no good at giving presents. Well, I'd like to think that I'm good at some aspects of gift-giving. I put thought into it, and often a lot of time. But when it comes to waiting or surprising I'm pretty much the worst. It usually works out, since as a procrastinator I don't frequently have long to wait between finalization of gift and handing it over, but every once in awhile I plan ahead and find myself with weeks of lag time. This simply will not do, and do it did not in the case of Zelda and the armless baby.

    Zelda's beloved Gob, a naked thriftstore baby George picked out a long time ago and had since abandoned -- her akimbo limbs and creepy, uneven, dead-eyed blink citable as potential turn-offs -- recently lost an arm. It's no shame for her; she's dragged around by her arms more than anyone can be expected to survive, limbs intact. This hasn't affected Zelda's love much, but it was a good opportunity for me to make her a new doll. With her birthday coming up, I had the occasion in addition to the reasoning. 

    Waldorf doll making has always intimidated me. The particular supplies, the expense and the precise techniques were hurdles I hadn't overcome though I've long admired the style. Meg McElwee's book Growing Up Sew Liberated: Making Handmade Clothes and Projects for Your Creative Child includes a pattern for a Waldorf doll, and it's been in the back of my mind since George was smaller. Alas, he's never really taken to dolls. Zelda is a different story, though, my children being so unbelievably gender stereotypical as to make me think someone is playing a joke.

     I love Meg's book (and blog) and the directions seemed clear enough to allow for some finagling according to my budget and crafting style which is a little more by-the-seat-of-my-pants than Waldorf dolls generally call for.

    I regret that the face isn't shaped, and if I ever make another I'll put more time into the facial features. The body is out of some soft bamboo velour I thought was perfect for a one year-old to snuggle, and the clothes are made from fabric scraps (Heather Ross' beautiful and now out of print mermaids) and leftover yarn. Choosing the hair yarn was tough, and I wish that I'd found something more colorful to make a real rainbow mop but that, too, is something for the next attempt.

    This doll is most definitely a quick and dirty version of a Waldorf doll, but the Sew Liberated pattern and instructions gave me a great starting point and I gained some knowledge about how to attach arms and heads in ways that don't result in droopy shoulders and floppy necks. Because it's tough to have a tea party with someone who can't stay awake.

    She's real cute, and, true to form, I couldn't wait until Zelda's birthday to see the reaction, even though every gift I've ever handmade for my kids has been met with the same vague interest. When will I learn? Never! It doesn't really matter -- most of the fun is in the making, anyway. 

    At their introduction, Zelda dubbed her "Dunna!" which we took to mean Donna, a perfectly suitable sister for an armless baby named Gob. 

    They were fast friends, though Donna's gonna have to do something to prove her unconditional devotion á la allowing herself to be drawn and quartered. 

    The entire project took me three evenings of off and on work, the most time-consuming being the altogether pleasant handwork of the face, hair, and foot shaping.


    I think Zelda's actual birthday may see the opening of a matching outfit or two, because I am that person I would never have expected myself to turn into, who loves matching outfits on pretty much anyone and anything. When I was little, my mom made me a life size Raggedy Ann with a dress and pinafore for each of us, and if photos are to be believed it was a monumental hit.

    I think a more androgynous doll may be next on the agenda. Overalls, shorter hair, and some actual facial features.

    Happy early birthday to you, Goldie. Here's to a (doll's)life-long friendship.


    Wednesday
    Dec122012

    DIY photobooth-style family photos

    The other morning on the radio, I heard a piece about hipsters: what defines a hipster, what sorts of things they like. It was kind of inadvertently funny, but had an interesting takeaway. Hipster culture is, one interviewee posited, a byproduct of a generation unable to display sincere emotion. Nothing can be enjoyed for its own sake, but must be enjoyed "ironically," presumably, I guess, because that lends the participants plausible deniability. 

    I'm definitely guilty of this sort of tendency to downplay my enjoyment through irony. Case in point: Though I've been decorating our house for the holidays since we moved, I've only this week stopped apologizing for the dorkiness and admitted that I just like holiday decorations. 

    Anyhoo, long story (not very) short, I hesitated to make the photobooth canvas Hanukkah project I'd chosen because I thought it might be too goofy, not arty or offbeat enough for our walls. Yes! That was stupid. Even after it was done, I asked Nathan if it wasn't too silly to hang up. I've only recently warmed to the concept of having family photos around the house (photos of family members who live in the home, that is), so this one was a stretch for me. I'm glad I went for it, because it's so cute. So, so cute. And here is how I did it (sorry for the funky formatting. All the info is there and I don't care enough to mess with it):


    To make the pictures look like they were taken in a photo booth, we positioned ourselves in front of the living room curtains, then, in Picasa, made them black and white and used the vignette tool. 

    I gathered my materials: 

    - an 8x24" stretched canvas (not pictured)
    - mod podge (matte)
    - foam brush
    - scissors
    - 4 5x7 family photos, B/W copied

    I cut the pictures out, and left a small border but wish I hadn't. 

    I then laid out the pictures where I wanted them, switching up the order until they looked right. In my case, Nathan and I have the darkest/most hair, so putting our pictures next to each other looked bad.


    For the mod podge initiated this will be obvious, but for those who don't frequently decoupage it may feel like you're screwing up your pictures. You are not! Brush a thick coat of mod podge onto the back of each picture, making sure to get the corners and edges. Stick them in place one by one and smooth out the bubbles, working from the middle to the outer edges. 

    Your paper will bubble up a little no matter how diligently you smooth, but don't worry. It'll dry flat.

    After you've placed your pictures where you want them and smoothed them all out, you can sit back and get a preview of how it's going to look when finished. 

    Adorable?

    Great!

    Next!


    Cover the whole surface with a thick coat of mod podge, being careful not to loosen any of your edges. I try to go in the same direction though I'm not sure it matters.

    Let the first coat dry (15-20 minutes) and do another coat. I did three coats and was really concerned about some major bubbling that was making George look like he'd been punched in the eye.

    I decided to leave it overnight to see if the bubbles went away, and they did! There are a few small creases and wrinkles, but I think that adds to the charm. 

    I hope yours turns out just as cute as ours! 


    Thursday
    Dec062012

    hundred dollar hanukkah: DIY menorah


    I really wanted the gift our family opened on the first night of Hanukkah to be one that at least one of the kids helped make (and, let's be honest, Zelda's talents don't exactly lie in crafts, so it was all on George). Being a DIYer, I have a tendency to take on all of the holiday handmaking and this leaves me burnt out and annoyed: NOT something I want to model for my children. In the DIT (do-it-together) spirit of this Hanukkah, I limited my own handmaking to one project and chose an easy craft that George and I could do for very little money, that would still be useful. 

    We have a beautiful menorah that I dearly love, and I hope that someday the kids will fight over whose family inherits it. But I have a more candlelight the better policy, and what's more Hanukkah-appropriate than a menorah? 

    I found the candle cups in the woodworking section at Michael's for $1.69 per 5-pack. I bought two packs and a piece of wood from the same section for $1.99. I used a coupon, so it was 40% off, bringing my total to $4.58. 

    We hot glued the candle cups to the board and doubled up the middle two for the shamash. 

    George went crazy with some royal blue and turquoise acryclic paint, and I filled in the spaces he missed, per his request. I'll probably seal it so the melted wax doesn't ruin the paintjob, but otherwise it was a very toddler-friendly project and turned out really well: a yearly reminder of George at almost-three.

    Even though it won't be a surprise, I know seeing it lit up with candles will be exciting for us all.  


    Thursday
    Aug232012

    a pony bead mobile

    Way back last winter when we were dying for new indoor activities, I bought a container of pony beads for George to string on pipecleaners. He enjoyed it for a little while but got good at it pretty fast and then the activity lost its charm. I'd bookmarked The Artful Parent's pony bead suncatcher tutorial and, though our beads weren't the translucent variety, thought we'd make a go of it anyway. George really likes playing with cookie cutters so even if the end result was a bust, I knew he'd have fun in the process. 

    The beads we have are a rainbow assortment which was good for our purposes. Older kids would enjoy making shapes or scenes out of the different colors, but "can you put another purple one into the star?" type stuff seemed to help George feel successful while still being mildly educational since he's got colors and shapes down pretty solidly.

    We talked about putting them into the hot oven (400 degrees for 20 minutes) so they would melt, and I asked him what he thought would happen to the beads -- would the colors blend together or would they stay separate? He's been pretty interested in cooking recently so I likened it to making a pizza, where the ingredients stay identifiable, or making a cake, where the ingredients blend together to make something that looks different. 

    Meanwhile, Zelda chewed on a cookie cutter. I let George choose which cutters we used, and he picked all of the Hanukkah shapes: dreidel, star of David, scrolls, and menorah, in addition to some ovals. Weird, but whatever.

    I got out the drill and a small bit and drilled holes in the finished shapes. This was easily the least popular part of the whole process. Zelda whimpered in fear and George cowered in the doorway saying, "do it fast!" After fastening on some fishing line and snipping the top ring out of an old oats canister, I tied them uniformly around the ring and added a bit of yarn for hanging. I'm not sure how long it'll last, but it's a pretty cute little mobile.

    Festive! And only four months early for Hanukkah. We'll totally do it again, but with the translucent beads. Guess who's proud of his handiwork?