SEARCH
social media
friends & sponsors
This form does not yet contain any fields.

    Entries in tutorial (3)

    Thursday
    Jul182013

    DIY aromatherapy calm down jar


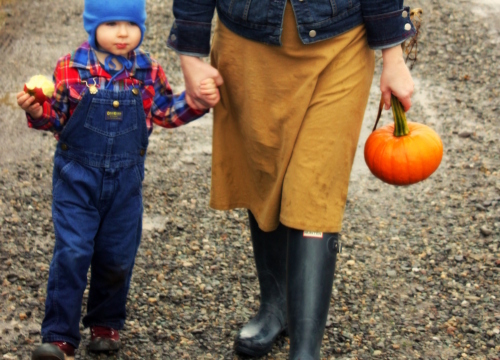
    Three and a half has brought with it some interesting changes in George's moods, behavior and communication. He's more in tune with his feelings than ever before, and when he has messed up (being hurtful to his sister, primarily, but also when he's being stubbornly unhelpful or otherwise rascally), he is more inclined to approach us with an apology and try to make amends without prompting. We still sometimes need to remove him from difficult situations for others' safety, or to respect their space, but his ability to shorten the distance between that and a willingness to fix it and move forward is heartening. To provide George with a new coping skill that might defuse the tension (or, metaphorically, diffuse it, if we wanna get homonymous), I decided to make him a calm down jar with an added aromatherapeutic factor. 

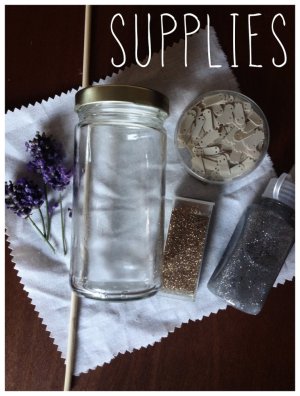
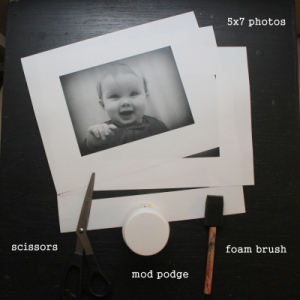
    You'll need an old jar, some fine(ish) glitter, glitter glue (mine is from the dollar store), a stirrer you don't care about (I used a bamboo skewer), a scrap piece of muslin or other cotton fabric roughly three times the size of your jar's lid, a bit of lavender, some confetti (optional; you could also use sequins, small buttons, whatever -- the heavier it is, the faster it sinks), and hot water. 

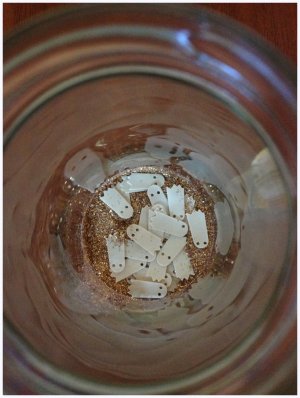
    Put a kettle on, or a cup of water in the microwave. You'll need hot water in the next step. Pour some of the glitter (NOT the glitter glue) into your jar (mine is a recycled jam jar with a tight-fitting lid). 1/4 inch in the bottom of the jar should be plenty. Add some confetti if you want; I had these weird ghosties leftover from something, but the glitter alone works just fine, too. 

    Fill your jar half full with hot, hot (not boiling) water. Squirt in some glitter glue, stirring constantly lest it clump up. I used about a third of a 3 oz bottle, and could've probably used less, but it's not an exact science. When you're satisfied that the glitter glue is totally incorporated, fill your jar up with hot water, leaving about half an inch of headroom at the top. Let it cool a little before you seal it, because you'll be doing some handling, and... it's hot. 

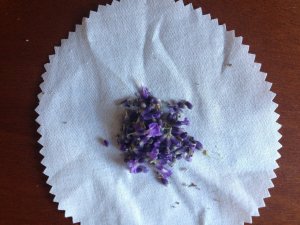
    Lay your lid on your fabric and mark a circle that's at least an inch larger on each side, the cut it out with pinking shears so it doesn't fray. Place some lavender in the center of the fabric. Close your jar as tight as you possibly can, and glue it if your kid might try to loosen it, because this spill would undoubtedly be the worst mess of all time. Carefully place the fabric, lavender side down, on the lid, and push any stray lavender back on top of the lid. Secure it tightly with a ribbon.

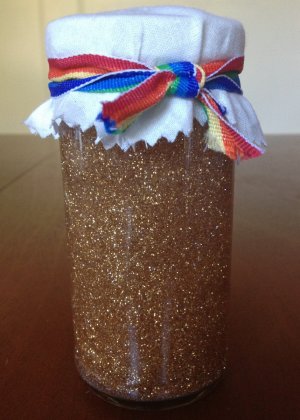
    Shake it up, give the top a scratch, inhale the calming scent of lavender and watch the glitter settle as your nerves do, too. Encourage your child to keep the jar in an accessible place and use it whenever they want. 

    Wednesday
    Dec122012

    DIY photobooth-style family photos

    The other morning on the radio, I heard a piece about hipsters: what defines a hipster, what sorts of things they like. It was kind of inadvertently funny, but had an interesting takeaway. Hipster culture is, one interviewee posited, a byproduct of a generation unable to display sincere emotion. Nothing can be enjoyed for its own sake, but must be enjoyed "ironically," presumably, I guess, because that lends the participants plausible deniability. 

    I'm definitely guilty of this sort of tendency to downplay my enjoyment through irony. Case in point: Though I've been decorating our house for the holidays since we moved, I've only this week stopped apologizing for the dorkiness and admitted that I just like holiday decorations. 

    Anyhoo, long story (not very) short, I hesitated to make the photobooth canvas Hanukkah project I'd chosen because I thought it might be too goofy, not arty or offbeat enough for our walls. Yes! That was stupid. Even after it was done, I asked Nathan if it wasn't too silly to hang up. I've only recently warmed to the concept of having family photos around the house (photos of family members who live in the home, that is), so this one was a stretch for me. I'm glad I went for it, because it's so cute. So, so cute. And here is how I did it (sorry for the funky formatting. All the info is there and I don't care enough to mess with it):


    To make the pictures look like they were taken in a photo booth, we positioned ourselves in front of the living room curtains, then, in Picasa, made them black and white and used the vignette tool. 

    I gathered my materials: 

    - an 8x24" stretched canvas (not pictured)
    - mod podge (matte)
    - foam brush
    - scissors
    - 4 5x7 family photos, B/W copied

    I cut the pictures out, and left a small border but wish I hadn't. 

    I then laid out the pictures where I wanted them, switching up the order until they looked right. In my case, Nathan and I have the darkest/most hair, so putting our pictures next to each other looked bad.


    For the mod podge initiated this will be obvious, but for those who don't frequently decoupage it may feel like you're screwing up your pictures. You are not! Brush a thick coat of mod podge onto the back of each picture, making sure to get the corners and edges. Stick them in place one by one and smooth out the bubbles, working from the middle to the outer edges. 

    Your paper will bubble up a little no matter how diligently you smooth, but don't worry. It'll dry flat.

    After you've placed your pictures where you want them and smoothed them all out, you can sit back and get a preview of how it's going to look when finished. 

    Adorable?

    Great!

    Next!


    Cover the whole surface with a thick coat of mod podge, being careful not to loosen any of your edges. I try to go in the same direction though I'm not sure it matters.

    Let the first coat dry (15-20 minutes) and do another coat. I did three coats and was really concerned about some major bubbling that was making George look like he'd been punched in the eye.

    I decided to leave it overnight to see if the bubbles went away, and they did! There are a few small creases and wrinkles, but I think that adds to the charm. 

    I hope yours turns out just as cute as ours! 


    Tuesday
    May102011

    tutorial: a little sling

    We were in Seattle for the weekend, staying in Bellevue while Nathan attended a yearbook teachers' thing, with plenty of time for walking around the enormous mall right across the street from our hotel. The only good score of our mall excursion(s) was a little Corolle baby with whom George fell instantly in love. I decided that he needed a carrier for Baby Tony (as he has since been dubbed), so I set out to make one. It worked! It's cute! And it took me about 15 minutes to make. 

    (You only need two D rings, but I had a 4 pack lying around.)